
Hi Everyone! May here with my first ever blog post! Back in April, I took a long-awaited solo trip to Paris and Copenhagen, and brought my Traveler's Notebook with me. Being a huge fan of Traveler's Notebook and having had mine for 7 years, I was surprised to note that this was actually my first time using it while traveling. I want to share my experience and some thoughts about sketching and journaling on the go!
As an artist, and a person with some minor anxiety issues, sketching in public has always been a challenge. Over the years, I've tried numerous ways to make sketching in public easier - quicker and less conspicuous. I had recently been consolidating my daily carry bag for the purpose of quick urban sketching, and at the same time, I had been accumulating more Traveler's Notebook accessories from Yoseka (a perk and danger of working in stationery). So when this trip came up, it was the perfect opportunity to try optimizing my TN for travel sketching. Here are some things that made pulling out my TN as easy as taking out a book or a phone to keep me company:
- Carry less equipment
- Get a tiny watercolor kit
- Allow yourself to do "bad" drawings
- Stay organized

1. Carry less equipment
While that sounds simple enough, it's actually quite difficult to fight the urge to fill your pencil case to the brim. My strategy was to choose one pen for each purpose or type of pen I needed. I had a Pilot Multi ball in medium as my main pen for line work, a stub nib TWSBI Diamond Mini filled with a bright color for shading, and a broad nib Kaweco Sport with black ink for thicker lines. Simple! No fumbling around in a big pencil case looking for a pen when I'm standing in a street corner. While more variety might suit other occasions and types of drawing, downsizing my equipment was crucial in helping me reach for my Traveler's Notebook more often.

2. Get a tiny watercolor kit
For days when I wanted more detail and color, I had my tiny watercolor palette and water brushes. I had DIY-ed this tin watercolor palette in 2020 (here is a tutorial I made for anyone who's interested) while dreaming of being able to travel again, and I'm so excited that I got to actually use it to its full potential. An easier option for coloring could be felt-tip brush pens or markers, but the watercolors allow you to mix your own colors, which is an amazing luxury to have on the go. For how small this palette is, it came in super handy when I wanted a bit more challenge in my sketches.

3. Allow yourself to do "bad" drawings
To my surprise, I was able to get a good variety of drawings done with my limited tools. Over the course of my week, I did settle into two modes of drawing, which I loosely termed sketching and journaling. Sketching, to me, means I'm drawing from observation and capturing my surroundings fairly truthfully. With these on-site sketches, I would make an effort to look closely at the landscape, buildings and people, to portray them as they are.
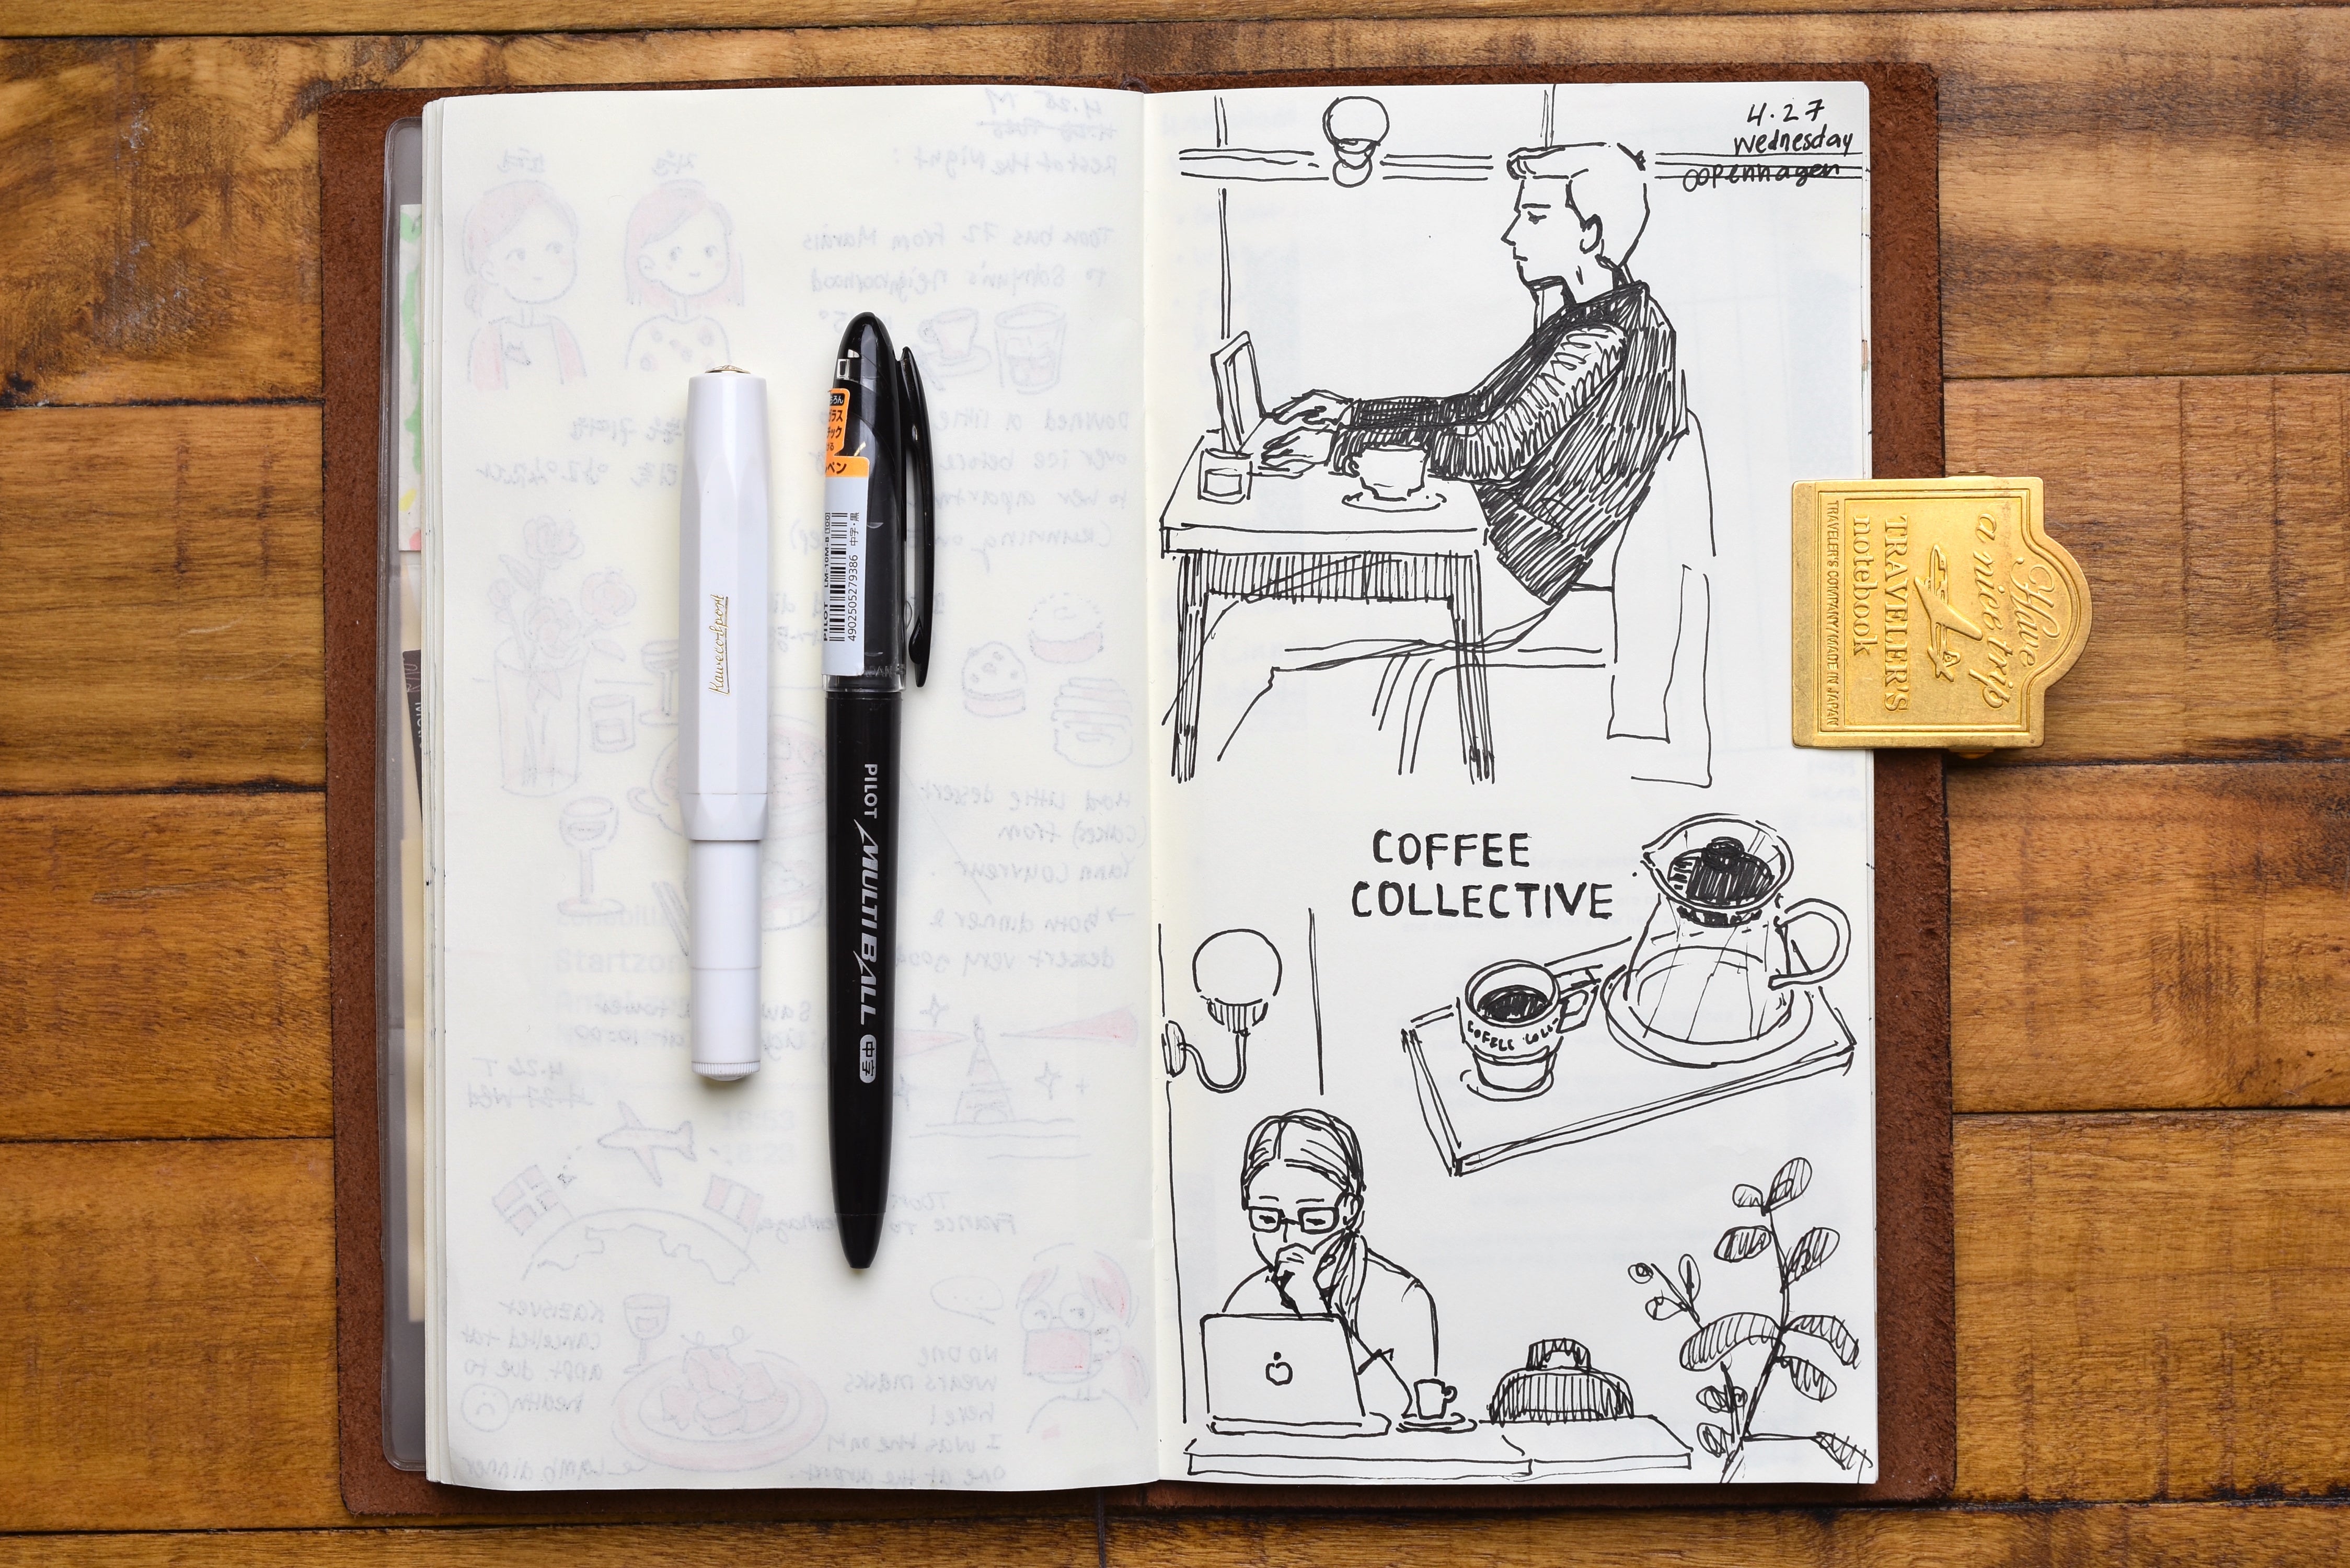
More important than the sketches, personally, were my journal pages.
For these pages, I used my Multi ball to draw, then went over with the orange ink in my TWSBI to shade. These doodles were super casual and did not have to be accurate or serve any purpose other than to jog my memory. I would do these doodles when I wanted to jot down some thoughts or write out my itinerary to organize my day. These informal, lower-stake drawings freed me from the stress of having to "draw well" and fill out a whole sketchbook with amazing drawings. Speaking of which, the "Short Trip" refill with 32 pages was the perfect amount of pages for my week-long trip.


4. Stay organized
It's important to stay organized when you are on the go, especially if you're collecting memorabilia to put into your journal. I certainly did save all kinds of leaflets, tags, tickets and business cards along the way and they were great additions to my journal pages. I used a clear pocket insert to hold all my paper goods. The card pockets were great for organizing my receipts and tickets by days of the week, so they're ready to be placed whenever I had the time to go back to my pages with a washi tape.

For me, the key to learning to love sketching in public was to lower the pressure of making great art, which all came down to simplifying the process involved. Less set up time means less build up. Less decisions to make = less overthinking, just doing.
Solo traveling, I learned, consisted of many moments where I found myself with nothing to do, in between activities and locations, moments I would have spent conversing with others if I weren't alone. Come to think of it, my days are full of these moments, not only when I'm traveling. Part of the process is learning to be totally comfortable in my body and myself in public. Once you open that sketchbook, it feels like you're opening yourself up to an audience in a way. Surprisingly, no one actually stares at you while you're drawing, and if they do, they usually only have positive things to say. But you'd never know if you stopped yourself from getting your sketchbook out! I'm glad that the steps I took to make sketching convenient made me more comfortable with that first step, and I hope sharing this experience is helpful to others with similar anxieties or hang-ups about sketching in public.
For further reference, here are the products I used on my trip:
Traveler's Notebook Regular in Brown
Refill for a Short Trip Regular size in MD Cream paper
Traveler's Factory Original Charm in Coffee Bean
Pilot Multi ball Rollerball pen in Medium
TWSBI Diamond Mini in 1.1 Stub nib
Pilot Iroshizuku Ink in Yu-yake
Sakura Koi Water brush in small
Happy sketching everyone!


6 comments
Amazing Blog Post! Also curious about fountain pen inks that withstand watercolor, without having to wait forever for the ink to dry first. Have been using ballpoint for the time being, but would love any recs for fountain pen inks!
Such an awesome blog post, and love the various compositions on the page! It’s got me wanting to paint more now!! I find the Sakura Pigment Microns are great for line work before watercoloring. The ink is water proof and archival quality :)
This is so great! I am just starting to draw in my Traveler’s Notebook. I got the watercolor paper and a
So inspiring. Really enjoyed reading your tips! Love what you’ve shared of your pages.
Hi May! I’m wondering if any fountain pen ink will hold up to watercolor. Or maybe I’m totally wrong and you’re painting first before going over with line art? 😅